
Kitchen cabinets are exposed to much more than dust and fingerprints. During cooking, tiny oil particles can travel through the air and settle on cabinet doors, drawer fronts, handles, and nearby surfaces. Over time, grease combines with dust and moisture, creating a sticky layer that makes cabinets look dull and harder to clean.
Learning how to Remove Grease From Kitchen Cabinets is not about choosing the strongest cleaning product. Harsh chemicals, abrasive tools, and excessive moisture can damage paint, laminate, wood finishes, and cabinet edges. A safer approach is to identify the cabinet material, start with a mild cleaning solution, and gradually increase the cleaning strength only when necessary. With the right technique and consistent maintenance, most everyday grease can be removed without compromising the appearance or finish of your cabinetry.
Why Grease Builds Up on Kitchen Cabinets
Grease buildup usually develops gradually as cooking oils become airborne and settle on surrounding surfaces. Cabinets positioned above or beside the stove tend to collect more residue because they are directly exposed to heat, steam, and cooking particles.
Handles and cabinet edges can become greasy for another reason: frequent contact. During food preparation, hands may carry traces of oil, butter, sauces, or food residue. These substances transfer easily to frequently touched areas and attract dust. Once this mixture sits on the surface, it becomes increasingly sticky. That is why cleaning small amounts of grease regularly is generally easier than waiting until a thick layer has formed.
Check the Cabinet Finish Before Cleaning
Before you attempt to Remove Grease From Kitchen Cabinets, determine what type of surface you are dealing with. Natural wood, finished wood, painted cabinets, laminate, and thermofoil can respond differently to water, detergents, and degreasers. If you are uncertain about the cabinet finish, test your cleaning solution in a hidden area before cleaning the entire surface. This simple step can help reveal whether the product affects the color, gloss, texture, or protective coating.
It is also important to control three things during cleaning: the amount of water, the strength h of the cleaner, and the pressure applied to the surface. Using more of all three does not necessarily produce better results and may increase the risk of damage.
Supplies You Need to Remove Cabinet Grease
You do not need dozens of specialized products to Remove Grease From Kitchen Cabinets. For most everyday buildup, basic household supplies are enough to create an effective cleaning routine. A soft microfiber cloth is especially useful because it can lift residue without creating unnecessary friction. Warm water and a small amount of mild dish soap are suitable starting points for many finished surfaces. A soft sponge can help with areas where grease has become slightly more stubborn.
For heavier buildup, a cabinet-safe degreaser may be appropriate. However, always make sure the product is compatible with the cabinet finish and test it in an inconspicuous location first. Avoid soaking the cabinet. Instead, apply the cleaning solution to the cloth and wring it well before wiping the surface.
The Right Way to Remove Grease From Kitchen Cabinets
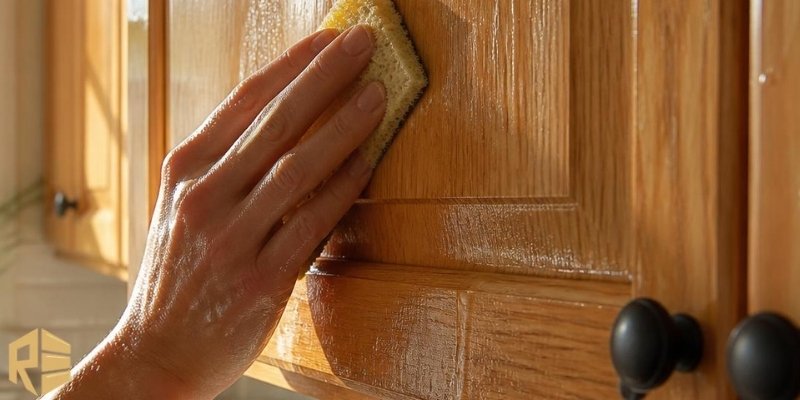
The safest way to Remove Grease From Kitchen Cabinets is to loosen the grease gradually rather than relying on aggressive scrubbing. Working in stages gives the cleaning solution time to break down residue while reducing stress on the cabinet finish.
Start With a Dry Wipe to Remove Dust and Loose Debris
Begin with a clean, dry microfiber cloth to remove dust, crumbs, and other loose particles. This step prepares the surface before moisture is introduced and prevents dry debris from being rubbed across the cabinet while you clean. Pay particular attention to decorative grooves, corners, upper cabinet edges, and the areas surrounding handles. Removing loose debris first makes the following cleaning steps more efficient.
Prepare a Mild Cleaning Solution for Greasy Surfaces
Mix warm water with a small amount of mild dish soap. The solution should be gentle rather than heavily concentrated. A stronger mixture is not automatically more effective and may leave residue or affect certain finishes. Dip the microfiber cloth into the solution and wring it thoroughly. The cloth should be damp enough to loosen grease but not wet enough to leave excess water on the cabinet.
Work in Small Sections for Better and Safer Results
Instead of cleaning the entire kitchen at once, work on one cabinet door, drawer front, or small section at a time. Use gentle overlapping movements and allow the cleaning solution to loosen the grease. If the first pass does not remove everything, repeat the process. Giving the residue another opportunity to soften is safer than immediately increasing pressure or switching to a harsh chemical.
Wipe Away Cleaning Residue Without Leaving Moisture Behind
After the grease has been removed, wipe the surface with a clean, slightly damp microfiber cloth. This removes remaining soap and prevents a film from developing as the cabinet dries. Finish by using a dry cloth to remove moisture. Be especially careful around seams, hinges, joints, and exposed edges, where water can cause problems if it remains for too long.
Escalate Carefully When Dealing With Heavy Grease Buildup
Old grease may need several cleaning passes because it can combine with dust and become firmly attached to the surface. If mild soap does not provide enough cleaning power, consider using a product specifically designed for the cabinet material. Always perform a spot test before applying a stronger degreaser. If the finish becomes dull, discolored, sticky, or otherwise altered, discontinue use immediately.
Choose the Cleaning Method Based on Cabinet Material
The material and finish of your cabinets should determine the cleaning approach. Using the same product and technique on every cabinet can create unnecessary risks, particularly when wood or painted surfaces are involved.
| Cabinet Material | Recommended Cleaning Method | Main Precaution |
|---|---|---|
| Finished Wood | Mild soap and microfiber cloth | Avoid excess water |
| Natural Wood | Gentle wiping with minimal moisture | Protect the finish |
| Painted Cabinets | Mild cleaner and soft cloth | Avoid abrasive scrubbing |
| Laminate | Damp microfiber and suitable cleaner | Keep seams dry |
| Thermofoil | Mild soap and soft cloth | Avoid harsh chemicals |
| Metal Hardware | Warm water and mild detergent | Avoid abrasive tools |
The table is a general guide rather than a substitute for manufacturer instructions. Different finishes can have different care requirements, so always follow the recommendations provided for your specific cabinetry.
Common Mistakes That Can Damage Kitchen Cabinets
Trying too hard to Remove Grease From Kitchen Cabinets can sometimes cause more damage than the grease itself. Steel wool, abrasive sponges, concentrated detergents, strong solvents, and excessive water can affect the cabinet finish. Another common mistake is assuming that a household cleaner is safe for every surface. Cabinet finishes vary considerably, so a product that works well elsewhere in the kitchen may not be appropriate for cabinetry.
If a greasy-looking mark remains after several gentle cleaning attempts, consider whether the problem could be discoloration or finish damage rather than removable grease.
When Grease Is Actually a Cabinet Finish Problem
Sometimes a cabinet that appears greasy may actually have a damaged or deteriorating finish. Long-term exposure to moisture, oil, heat, or unsuitable cleaning products can change the appearance of cabinetry.
Look for Signs of Cabinet Surface Damage
Peeling, bubbling, swelling, cracked coatings, damaged veneer, or permanent discoloration may indicate that cleaning is no longer the main solution. If the surface does not improve after careful cleaning, avoid repeatedly scrubbing the same area.
Consider Professional Evaluation for Serious Damage
Experienced San Diego cabinet specialists can help determine whether the problem requires cleaning, repair, refinishing, refacing, or replacement. A professional assessment can prevent unnecessary damage caused by repeated DIY cleaning attempts.
How to Prevent Grease From Building Up Again
The easiest way to Remove Grease From Kitchen Cabinets is to prevent thick buildup from developing. Regular maintenance requires less effort and reduces the need for stronger cleaning products.
Clean High-Risk Areas More Frequently
Cabinets near the stove, cooktop, and food preparation areas should receive more frequent attention. Handles and drawer fronts should also be included in your regular cleaning routine. A few minutes of maintenance each week can prevent a thin oily film from becoming a stubborn layer.
Improve Kitchen Ventilation and Use the Range Hood
Using a range hood while cooking can help reduce airborne grease and cooking residue. Keeping the hood and filters clean also helps maintain effective ventilation. If you are planning new cabinetry, the finish and material should reflect the way the kitchen is used. Homeowners considering Custom cabinets in point loma can discuss practical material and finish options with a cabinet professional.
When Cleaning Is No Longer the Best Solution
Cleaning is effective for surface grease, but it cannot repair swollen materials, damaged finishes, or deteriorated cabinet components. Continuing to use stronger chemicals in these situations can make the existing problem worse.
Know When to Stop DIY Cabinet Cleaning
If you notice peeling, swelling, separation, severe discoloration, or damaged edges, stop aggressive cleaning. Professional assessment can help determine whether the cabinet can be restored or whether replacement is more practical.
Understand the Maintenance Needs of Different Cabinets
Cabinet maintenance also depends on the environment. For example, Bathroom cabinets in San Diego are more likely to experience humidity, condensation, and water splashes, while kitchen cabinets are more exposed to cooking grease and heat. Understanding these differences can help homeowners choose suitable materials and develop better maintenance routines.
Final Thoughts
Keeping kitchen cabinets free from grease is easier when you use the right cleaning method and avoid excessive moisture or harsh chemicals. Start with a mild solution, use a soft microfiber cloth, and choose the cleaning approach according to the cabinet material.
Regularly cleaning high-risk areas, handles, and edges can prevent stubborn buildup and help protect the cabinet finish. If you notice peeling, swelling, or permanent discoloration, professional repair or refinishing may be a better option than continued cleaning.
Frequently Asked Questions About Removing Cabinet Grease
- What Is the Easiest Way to Remove Grease From Kitchen Cabinets?
Start with warm water and a small amount of mild dish soap. Use a soft microfiber cloth, wipe gently, remove any soap residue with a clean damp cloth, and dry the cabinet afterward.
- Can You Use a Commercial Degreaser on Wood Cabinets?
Only use a commercial degreaser if it is compatible with the specific wood finish. Always read the product instructions and perform a spot test before applying it to the entire cabinet.
- Is Vinegar Safe for Removing Grease From Kitchen Cabinets?
Vinegar should not automatically be considered safe for every cabinet finish. Before using it, check the manufacturer’s care instructions and test it on an inconspicuous area.